In 2010 I moved to Letchworth, a town historically known for being the first Garden City, the first uk roundabout and more recently being one of the locations for Simon Pegg’s new movie. It is also the home of The Settlement (http://www.letchworthsettlement.org.uk), an adult education centre that was formerly a non licensed public house. The Settlement offers adult evening classes as well as workshops, so being new to the area I decided to join. One workshop that grabbed my eye was cushion making. It promised to teach you to make 3 cushion types in 6 h and cost £30. I signed up immediately!
In October 2010 I tootled down my road, sewing machine in one hand and in the other a bag containing 3 pieces of 1 m fabric, a 50 cm cushion pad and my transportable sewing case. By this time I had also joined Letchworth hockey Club, and due to it being the start of the season I had to miss the first game. The excuse of I’m off cushion making was met with many a sarcastic comment. However, one thing I am sure of is my own mind and I thought screw it I’m going sewing!
The course leader was Majorie Charter, an extremely knowledgeable soft furnishings expert, who owns her own local business making custom made blinds, cushions and curtains(http://www.theartofinteriors.co.uk).
We learnt how to make the 3 styles in the following order:
Cushion 1: Oxford edge
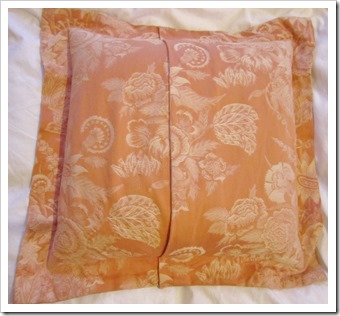
Prior to the course I had just thought this was a style of expensive pillowcase. How wrong I was! The great thing about this cushion is that you don’t need to insert a zip!
The fabric I chose had a large pattern of a flower in an urn and I decided to make this the central focal point of the cushion. I personally wouldn’t use this style of cushion for a sofa cushion but more of a feature cushion for a leather high back chair.
Cushion 2: Button cushion
 This is a speed cushion, which we completed in an hour. Basically you just sew two squares of fabric together, so again it does not require zip insertion!
We created two buttons from the same fabric using a button making device. one was placed either side of the cushion and joined together by pulling the thread through the centre of the cushion. The tension created between the buttons causes the centre of the cushion to squash down. The drawback to this cushion is that you can’t remove it without un-stiching.
The fabric I chose here was hard wearing as I think this is a good cushion for seat pads due to the naturally flatter shape.
Cushion 3: Piped Edge.
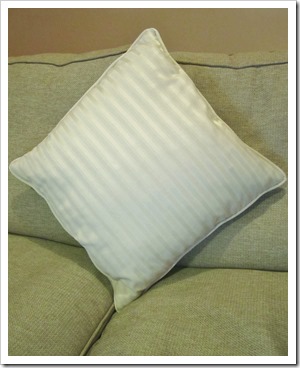
 This is my favourite type of cushion! In my eyes the piped edge just completes the look. It is more fiddly as you have to create the piping using your main fabric and insert a zip.
I used a cream striped fabric to produce a nautical look. The piping uses material cut on a diagonal edge and therefore the piping stripes are at a contrasting angle to the main body of the cushion.
There were 5 other female course delegates, age ranging from 30- 60 y. It really was an enjoyable day chatting away about cushions, fabric shops and life in general and in summary was £30 very well spent.
You’ll be pleased to know the end of the course was not the end of my cushion creating! In fact I sometimes worry I might be a bit obsessed with cushions, they have overtaken the sofa and sometimes I can’t fit on!
Cushions are excellent at transforming the look of the room and I like to change my cushions to reflect changes in season. The following album contains cushions covers I have made for my home and friends and family as well as a new cover for my Ikea poäng chair and footstool.


